I love making homemade bread. It makes the kitchen smell so good & it tastes good too!! It's pretty easy to make, but it does take about 3 hours from start to finish.
Ingredients:
6 1/2 Cups Flour
3 Tablespoons Sugar
1 Tablespoon Salt
2 Tablespoons Shortening (I use margarine)
2 Tablespoons Yeast
2 1/4 Cups of warm water (120-130 degrees Fahrenheit)
Mix 3 1/2 Cups of flour, sugar, salt, shortening and yeast in a large bowl. Add the warm water. Beat with a mixer 1 minute on low speed and then 1 minute on medium speed. Stir in the remaining 3 Cups of flour, 1 Cup at a time, until the dough is easy to handle.
Turn the dough onto a lightly floured surface and knead the dough for 10 minutes. If you have an electric mixer, you can kneed the dough with a dough hook on your mixer (it will take less than 10 minutes this way - mine takes 5 minutes). Grease a large bowl and put the ball of dough in a greased bowl and then turn the dough over so the greased side is up. Cover the dough and let it rise in a warm place for 1 hour. I cover mine with a towel or foil and then I put it inside my oven with the oven turned off for it to rise.
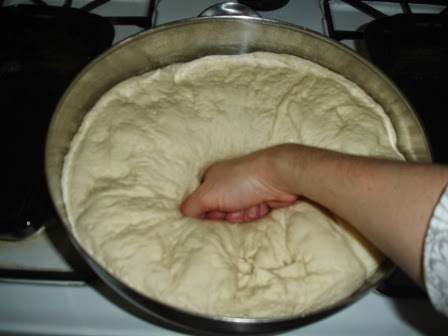
This is what my dough looks like after it's risen for 1 hour. Punch the dough down and divide it in half.
Roll each half into a long rectangle on a floured surface (I do this on a piece of foil to make an easy clean up). Make sure the dough isn't wider than your bread pan.
Roll the dough up tightly, sealing the dough to the bottom with your fingers after each roll.
Seal the edge of the dough to the rest of the dough by pressing it down with your fingers.
Roll the ends of the dough towards the bottom and seal them to the bottom of the dough.
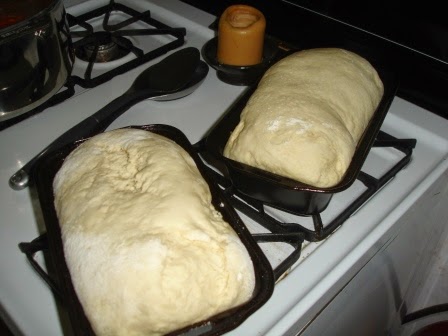
Do this step with both pieces of dough. Grease two bread pans. Place the dough seam side down in the bread pan. Cover and let it rise in a warm place for 45 minutes.
Dough before it's risen the second time
Dough after it's risen the second time
Bake at 425 degrees for 25-30 minutes. I sometimes cover mine lightly with foil about 15 minutes into the cooking time so that the tops don't get too brown.
Recipe Credit: Betty Crocker


.JPG)


